Chocolate Berry Cake with Italian Buttercream

Even the name sounds tempting, no? This recipe is from Anna Olson’s show, Bake with Anna Olson from www.foodnetwork.ca.

Below is a picture of her cake.

Chocolate Berry Cake with Italian Buttercream

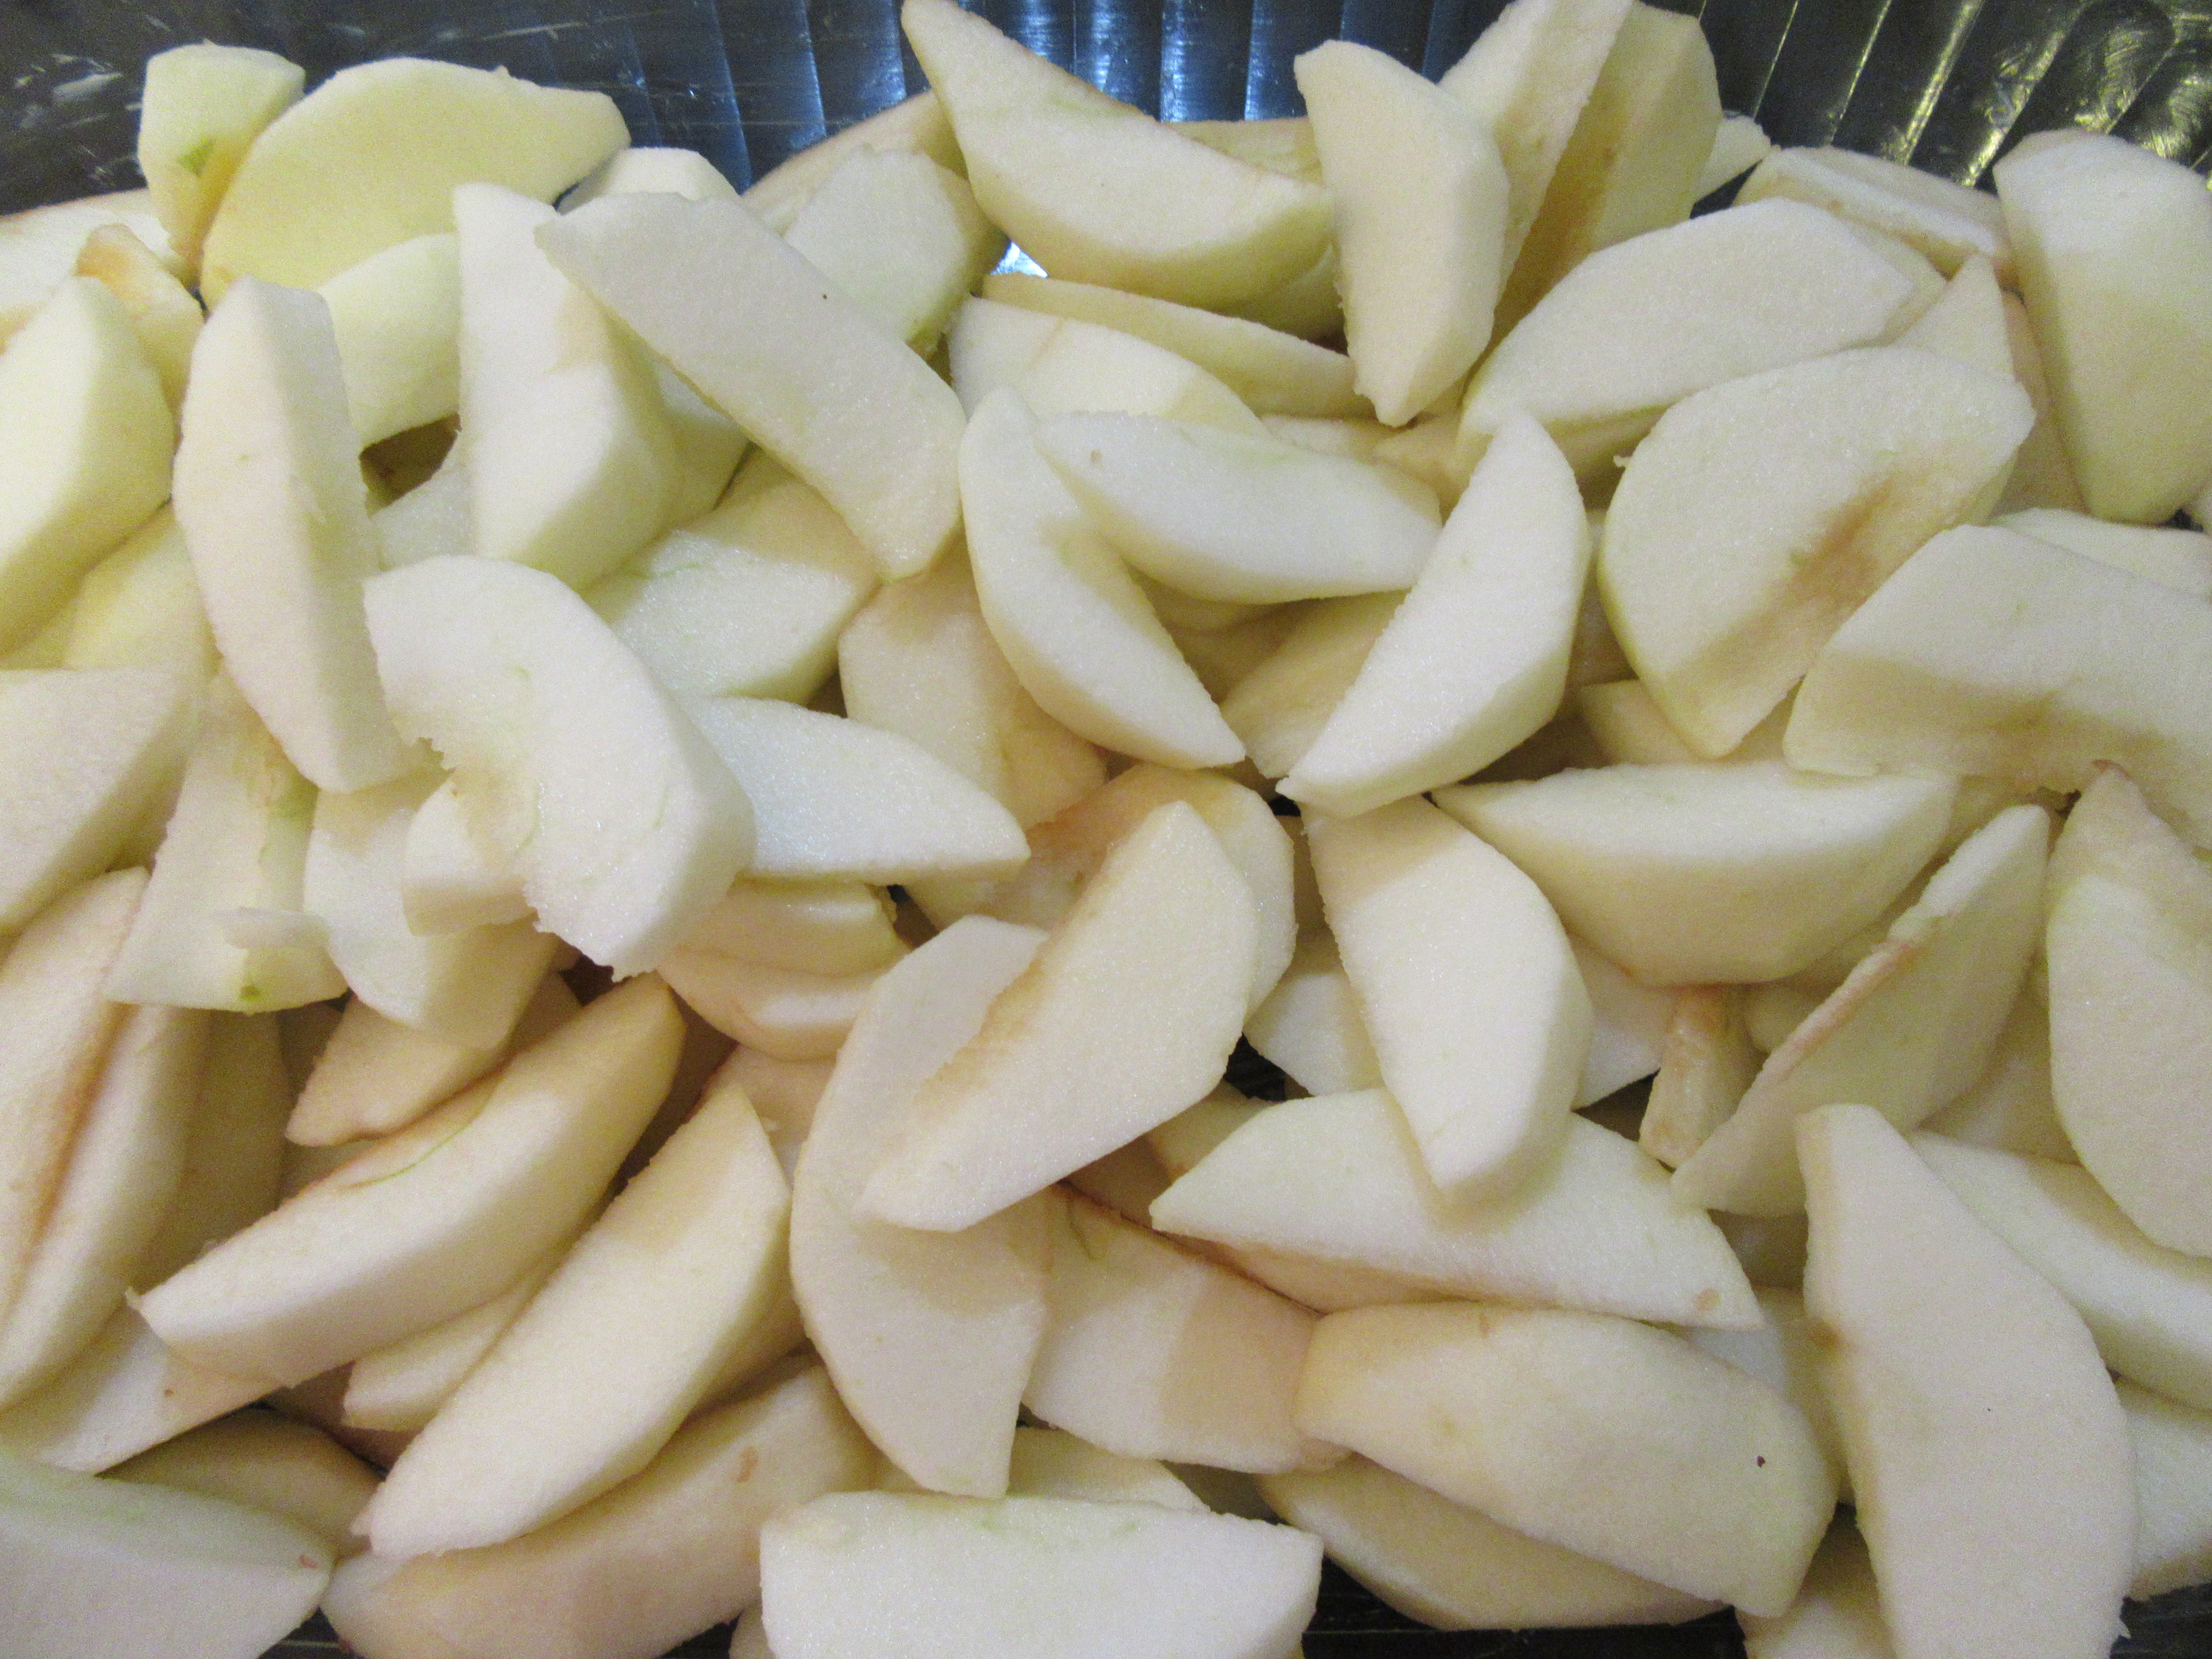
I start by measuring out all of the ingredients, for both the cake and the buttercream and prepping the cake pans.


For the cake, start by pouring the hot coffee over the chopped chocolate and whisk until the chocolate is melted. In a separate bowl, sift the flour, cocoa, baking soda, baking powder and salt. In another bowl, whisk the buttermilk, oil, egg, egg white and vanilla.

Add the buttermilk to the dry ingredients and stir to blend. Add the melted chocolate mixture and whisk in. Divide the batter into the pans. Bake for approximately 30 minutes.

Cool the cakes on a wire rack for 30 minutes then remove from the pans to cool completely.

To make the buttercream, beat the egg whites and salt in a large mixing bowl on medium speed until the whites are foamy. Increase to high speed and add the first portion of sugar and beat until soft peaks form.

Bring the rest of the sugar and water to a full bowl on high heat. Heat to 240F on a candy thermometer, without stirring. Carefully add to the egg whites and continue mixing on high speed until cooled to room temperature.

Add the butter, a bit at a time, scrapping down the bowl once or twice. Beat in the vanilla. Spoon about 1½ cups into a separate bowl and beat in the melted chocolate then the berries. Place a layer on a plate and add half of the chocolate-berry buttercream and spread evenly. Add another cake layer and repeat. Top with the final layer.

Lightly tint the remaining buttercream a light pink. Frost the top fully and crumb coat the sides. Place 1/3 of the remaining buttercream into a piping bag with a large plain tip. Add a bit more food colouring to the rest of the buttercream and place half into another piping bag fitted with a large plain tip. Add a bit more food colouring to the remaining buttercream and place that in a piping bag fitted with a large plain tip. There should now be three piping bags: 1 light pink, 1 medium pink and 1 dark pink.

IMG_0283

Pipe two vertical dots of the dark pink. Below, pipe two dots of medium pink. At the bottom, pipe two dots of the light pink. Use a small palette knife to smear each dot to make each resemble a petal. Pipe another row of dots next to the first, moving the colours down one (1 light, 2 dark, 2 medium and 1 light). Repeat the ‘smearing’ and dropping the dots down one until the piping the last row of dots. Make smaller ‘smears’ to blend in.

 Enjoy with a glass of milk!


Ingredients

Cake

  • 1½ oz semi-sweet or bittersweet chocolate, chopped
  • 3/4 cup hot brewed coffee
  • 1½ cups granulated sugar
  • 1¼ cups all-purpose flourà3/4 cup Dutch process cocoa powder
  • 1 tsp baking soda
  • ½ tsp baking powder
  • ½ tsp salt
  • 3/4 cup buttermilk
  • 6 tbsp vegetable oil
  • 1 large egg
  • 1 egg white
  • 1 tsp vanilla extract

Buttercream and Assembly

  • 6 large egg whites, at room temperature
  • 1 pinch salt
  • 2 cups sugar, divided
  • ½ cup water
  • 2 cups + 6 tbsp unsalted butter, at room temperature
  • 1 tbsp vanilla extract
  • 2 oz semi-sweet or bittersweet chocolate, melted and cooled to room temperature
  • Pink food colouring paste (or colour of your choice – or even none)

Cake

Preheat the oven to 300oF. Grease three 8-inch round cake pans. Dust with flour, tapping out any excess and then line the bottom of the pans with parchment paper.

Place the chopped chocolate in a small bowl, cover with the hot coffee and let set a minute. (The hot coffee helps to intensify the chocolate flavour). Whisk to melt the chocolate and set aside. Do not worry if the mixture does not look smooth.

In a large bowl, sift the flour, cocoa powder, baking soda, baking powder and salt. In a separate bowl, whisk the buttermilk, oil, egg, egg white and vanilla. Add the buttermilk mixture to the dry ingredients, stirring by hand until smooth. Add the melted chocolate liquid and whisk in. Divide the batter between the prepared pans (the batter will be fluid and will not fill the pans but the cake rises beautifully) and bake for about 30 minutes, until a skewer inserted in the centre of the cake comes out clean. Allow the cakes to cool on a rack for 30 minutes before removing them from the pans to cool completely.

Buttercream and Assembly

Place the egg whites with a pinch of salt in a large mixing bowl (and use electric beaters) or in the bowl of a stand mixer fitted with the whip attachment and whip on medium speed until the whites are foamy. While increasing the speed to high, slowly pour in ½ cup of the sugar until the whites just begin to hold a soft peak.

Bring the remaining 1½ cups of the sugar and the water to a full boil over high heat in a small saucepan. Using a candy thermometer to measure, boil the sugar without stirring until it reaches 240oF. Immediately remove the pot from the heat. Turn the mixer (or beaters) on high speed and very carefully pour the sugar down the side of the bowl (never into the moving beaters or it will splatter). Continue to mix the meringue on high speed until it has cooled to room temperature (this could take 8 – 10 minutes).

Still on high speed, start adding the butter, a little at a time but there is no need to wait until the first bit is worked in before adding the next. Scrape down the bowl once or twice while beating and don’t worry when the meringue deflates a little when you add the butter – it’s meant to happen. Beat in the vanilla.

Spoon about 1½ cups of the buttercream into a separate mixing bowl and beat the melted chocolate into it, followed by the berries. Set the remaining buttercream aside to mask and decorate the cake. Work with both buttercreams while at room temperature.

To assemble the cake, place one of the cakes on a cake board or plate and spread half of the chocolate-berry buttercream over the top. Place a second layer of cake on top, pressing slightly to secure it in place. Spread the remaining half of the chocolate-berry buttercream on this and top with the last cake.

The cake is frosted using 3 tones of pink, a light, a medium and a dark. Tint the whole batch of remaining buttercream with just a little pink for the light tone. Use this to frost the top and sides of the cake, spreading to level. Make sure the top is fully covered (masked) with the light pink buttercream but the sides can have a sheer layer (crumb coat) since they will have additional buttercream piped on.

Place a third of the remaining buttercream into a piping bag fitted with a large plain tip. Tint the remaining buttercream to a medium pink and spoon half of this into a piping bag fitted with a large plain tip. Now, add more pink colouring to the rest of the buttercream to make a dark pink and all of this goes into a third piping bag fitted with a large plain tip. You should now have 3 piping bags of buttercream: 1 light pink, 1 medium pink and 1 dark pink.

To create a petal pattern on the cake, pipe a single row of dots vertically down the side of the cake, two of each colour, starting with the darkest at the bottom, moving to the lightest at the top (2 dark, 2 medium, 2 light). Use a small palette knife to ‘smear’ each dot in the same direction, so that it looks like a petal (you may need to wipe off the spatula occasionally). Pipe another row of dots overtop where the ‘petals’ flatten, but moving the colours up on row and continue piping and smearing around the cake. When you reach where you started, make the smear a smaller, shorter move so it blends in.

Steptoitbaker

Apple Crisp

Fall is definitely the time for all things apple! One of my favourites is apple crisp. Just thinking about it is making me hungry.

I like to start by measuring all my ingredients and prepping the pan. That way, the rest goes so much faster.

Baking pan greased and ready to go
Apples peeled, cored and sliced
Dry ingredients measured
Browning butter to add caramel flavour to the apple cris
Brown butter to add caramel flavour to the apple crisp

Once the butter has melted, add to the dry ingredients and blend until crumbly and well blended. I use a pastry cutter but you could use two knives worked against each other.

Making the crisp topping

I add the spices directly to the apples. I like lots of cinnamon so I don’t measure – I just sprinkle until the apples are completely covered. I also add nutmeg, allspice and cloves.

Spices up apples
Spice up apples

Spread the topping evenly over the apples. The crisp is then ready for the oven.

Ready for the oven
Ready for the oven

Bake until the apples have softened and the topping is golden brown.

Out of the oven but still too hot to eat

To serve, I add a dollop of warmed caramel sauce and whipped cream.

Ingredients:

  • 2/3 cup butter, melted
  • 2½ cups lightly packed brown sugar
  • 2/3 cups flour
  • 1 1/3 cups rolled oats (not instant)
  • cinnamon, nutmeg, allspice and ground cloves
  • 10 peeled, cored and sliced apples

Grease a 9″ x 13″ pan. Preheat oven to 375 F oven.

Brown the butter and add to the flour, brown sugar and rolled oats. Use a pastry cutter or two knives worked opposite each other to blend until crumbly. Season the apples with the cinnamon, nutmeg, allspice and ground cloves. Spread the topping over the apples. Bake for 40 minutes or until the apples are tender and the topping is golden brown.

Recipe from Purity Cook Book, The Complete Guide to Canadian Cooking.

Steptoitbaker

Almond Cupcakes with Caramel Buttercream Icing

 Who doesn’t like cupcakes? Who doesn’t like caramel? Why not combine the two into a tasty treat!

Almond Cupcake with Salted Caramel Buttercream Frosting
Photo from http://www.allrecipes.com

As always, I like to assemble all of the ingredients first so I can then quickly prepare my creation. Also, for many recipes, it is important to bring any milk and eggs to room temperature first (but always follow the specific instructions for the recipe you are using).

Ingredients measured and ready to use

Start by whisking the flour and baking powder together in a bowl. This mixes the two together and helps to eliminate any clumping.

Flour and baking powder whisked together

Add the butter and sugar to a mixing bowl. Cream together until well blended then add the eggs, one at a time and beat until thoroughly combined.

Almond cupcakes with caramel icing 012

Add the eggs, one at a time, until blended thoroughly. Add the vanilla and almond extracts.

Almond cupcakes with caramel icing 010

Add the flour mixture, alternately with milk (starting and ending with dry ingredients).

Last of dry ingredients to be mixed in

The batter can now be divided into the cupcake cups, filling the cups about 2/3 full.

Almond cupcakes with caramel icing 019

Bake for 20 – 25 minutes, until a toothpick inserted into the centre comes out clean.

Cool the cupcakes for 5 minutes in the pan on a wire rack then remove the cupcakes and cool the cupcakes completely before icing.

In the interim, you can prepare the icing. First, I measure out all the ingredients.

Almond cupcakes with caramel icing 021

In a saucepan, combine the brown sugar, butter, corn syrup and vanilla. Cook over medium heat and bring to a boil.

Almond cupcakes with caramel icing 024

Reduce heat and continue to cook until thickened, 3 to 4 minutes.

Almond cupcakes with caramel icing 026

Allow to cool to warm and add the cream slowly until the consistency of honey. Add the salt and then cool to room temperature.

Almond cupcakes with caramel icing 031

With a mixture, cream together the butter and icing sugar until fluffy then add the caramel, slowly and beat until the frosting is smooth. Ice the cupcakes and then enjoy!

I added some caramel crumbles bought in the bulk food section of a local grocery store but you do not need to add these. You can drizzle the top with a caramel glaze or just leave plain. Experiment!

Almond cupcakes with caramel icing 033

Prep time 30 minutes Cook time 25 minutes  Ready in 1 hr 25 minutes

Ingredients

  •  1½ cups all-purpose flour
  • 13/4 cup baking powder
  • 1 cup granulated sugar
  • ½ cup butter
  • 2 eggs
  • 1 tsp vanilla extract
  • 1 tsp almond extract
  • 3/4 cup whole milk
  • ½ cup brown sugar
  • ½ cup butter
  • 2 tbsp light corn syrup
  • 1 tbsp vanilla extract
  • ½ cup whipping cream, or as needed
  • 1 pinch salt
  • 3/4 cup salted butter, softened
  • 2 cups icing sugar, sifted

Preheat oven to 350oF (175oC). Line 12 cupcake cups with paper liners. In a bowl, whisk together the flour and baking powder.

In a mixing bowl, thoroughly cream together the sugar and ½ cup of butter until very well blended. Beat in eggs, one at a time, until thoroughly combined, and stir in the vanilla and almond extracts. Gradually beat in the flour mixture, alternating with the milk (start and end with dry ingredients), in several additions. Spoon the batter into the prepared cupcake cups, filling them about 2/3 full. (You can use an ice cream scoop to evenly distribute the batter among the cupcake cups).

Bake the cupcakes in the oven until a toothpick inserted into the centre of a cupcake comes out clean, 20 – 25 minutes. Cool on a wire rack for five minutes and then remove the cupcakes from the pan and allow to cool completely before icing.

To make caramel, place the brown sugar, ½ cup butter, corn syrup and vanilla into a large saucepan over medium heat and bring the mixture to a boil. Reduce the heat and simmer until thickened, 3 to 4 minutes. Remove from heat and allow to cool to warm (not hot) temperature. Add the cream, a little at a time, until the caramel has the consistency of liquid honey. Mix in the pinch of salt and allow to cool to room temperature.

Beat the salted butter with icing sugar in a bowl with an electric mixer on medium speed until the mixture is fluffy. Slowly add and beat in the caramel, a tablespoon at a time, beating until the frosting is smooth.

Once the cupcakes are cool, ice with the caramel frosting.

Steptoitbaker

Apple Oatmeal Muffins

It’s fall and that means it’s also apple season. I wanted to bake something for breakfast so I opted for oatmeal apple muffins. I used the Apple Oatmeal Muffin recipe by Sue Lau on www.food.com since the recipe had some good reviews.

To start, I measured out all of the ingredients.

I like to measure out all the ingredients first to quickly make my baking creation.

The pan was prepared by putting muffin papers into the slots. Alternatively, you could lightly grease the muffin pan but I don’t choose that option to keep the calorie count down.

I prefer to line the muffin cups with paper instead of greasing the muffin cups.

Start by lightly beating the eggs. Then the oil and milk was added and the mixture was stirred until just blended.

Just stir the eggs, oil & milk until blended.

Next, the flour, oatmeal, sugar, salt, baking powder, cinnamon, nutmeg and allspice were added to the egg mixture and blended just until moistened.

Stir in the dry ingredients just until blended. Do not over mix.

Do not over stir! The batter will be lumpy. Finally, add the apples and fold until blended.

Add the apples and fold in just until blended.

Evenly spoon the batter into the prepared muffin pan.

Muffins are ready to go into the oven.

Bake at 400oF oven for 15 – 20 minutes, until a toothpick inserted into the middle comes out clean. Cool on a wire rack for 5 minutes then remove the muffins from the pan and continue to cool them on the wire rack until they reach room temperature. (If you can wait until then before eating any)!

Baked muffins need to cool in the pan on a wire rack for 5 minutes.
Muffin cooling in the pan.

The muffins were finally ready to be eaten!

The muffin is finally ready to eat!

Prep time 10 minutes Total time 40 minutes (includes cooling)

Portion size 12 muffins

Ingredients

2 eggs
3/4 cup milk
½ cup vegetable oil
1 cup all-purpose flour
1 cup sugar
1 tsp salt (personally, I used only ½ tsp salt)
1 tbsp baking powder
1 tsp nutmeg
½ tsp cinnamon (I used 1 tsp)
½ tsp allspice (not in the original recipe)
2 tart apples, peeled, cored and diced

Preheat oven to 400 degrees F.

Grease a 12 cup muffin tin.

In a mixing bowl, lightly beat eggs; add milk and oil, stirring until just blended.

Stir in flour, oats, sugar, baking powder, salt, nutmeg, and cinnamon, mixing until only just moistened (do not over mix).

Gently fold in the apples.

Spoon batter into the muffin tin, dividing evenly among the cups.

Bake in a preheated oven for 15-20 minutes or until a toothpick inserted comes out clean.

Cool in pan 5 minutes before removing to a wire rack to finish cooling.

Serve warm or cool; store unused portions in an airtight container.

Buttermilk Biscuits

Today I was motivated to bake something to use up some buttermilk I had in the fridge. When I make pancakes or French toast, I always try to use buttermilk as the it makes them richer and fluffier than regular milk but without adding a lot of calories. Unfortunately, that usually means I have more buttermilk left over. My solution today was to bake some buttermilk biscuits for breakfast.

To start, I measured out all of the ingredients.

I like to measure out all of the ingredients before I start to bake. It makes everything proceed much faster and everything is right at hand when needed.

The flour, sugar, baking powder, baking soda and salt were whisked together. Personally, I prefer to whisk my dry ingredients as it is much faster than sifting and much less messy. A whisk is much easier to clean too.

I then used a pastry blender to add the butter to the dry ingredients to make the mixture resemble coarse crumbs.

Time to cut in the butter. If you do not have a pastry blender, two knives worked separately is a good substitute.

The egg was then whisked into the buttermilk and stirred into the dry ingredients using a fork to form a soft dough. It was slightly sticky at this point.

Slightly sticky dough but well blended

The dough was then formed into a ball and kneaded 10 times before being flattened by hand into a circle 3/4″ thick. Using a 2 1/2″ round cutter, the biscuits were cut out and placed on a parchment-lined rimless baking sheet.

Biscuits are ready for baking

The biscuits were baked for 13 minutes, to a nice golden brown.

A nice golden brown

Once out of the oven, I brushed to tops of the biscuits with some butter. After a few minutes of cooling time, the biscuits were ready to be sampled.

Buttermilk biscuits are ready to eat!
Prep time 10 minutes Total time 30 minutes (includes cooling)
Portion size 12 biscuits

Ingredients

2 1/2 cups all-purpose flour
2 tbsp. granulated sugar
2 1/2 tsp baking powder
1/2 tsp baking soda
1/2 tsp salt
1/2 cup cold butter, cubed
1 cup buttermilk
1 egg

In bowl, whisk together flour, sugar, baking powder, baking soda and salt. Using pastry blender or two knives, cut in utter until in coarse crumbs. Whisk buttermilk with egg; stir into flour mixture with fork to make soft dough.

With lightly floured hands, press dough into ball. On lightly-floured surface, knead gently 10 times. Pat into 3/4″ thick round. Using flourd 2 1/2″ round cutter, cut into rounds. Place on parchment paper-lined rimless or floured rimless baking sheet. Bake in 400F oven until golden brown, 12 to 15 minutes.

Topping: Brush with butter; sprinkle with sugar.

Purging

Every now and again, it’s good to go through your cupboards. You’d be surprised what you can find hidden away. I decided today was the day because when I was trying to decide what to bake next, I realized how disorganized my cupboards were currently. I had some baking ingredients such as sugar and flour mixed in with cereals and tomato paste. It’s not a good way to keep tabs on what you have and what should go on your grocery list if you don’t know what you have and where it is!

I have not finished the purging/rearranging but I did discover a half-empty/half-full bag of mini marshmallows that were no longer fresh. Into the trash with them, along with a few other items that were well past their best-before dates. (How did I let that happen)? I also found a can of unsweetened pumpkin that I make frozen pumpkin cubes as natural treats for my dog. She will be happy with me tomorrow!

Now that I know what’s in my cupboards, I can make a more informed choice about what to bake. I’ll keep you posted (pun intended, sorry)!

steptoitbaker